It’s nearing that time of the year where family traditions are shared amongst your loved ones. In preparation for the upcoming turkey day, I’d love to share with you a tradition that I’ve started with my kids, which carried over from something I used to love doing as a child and continued into my adult life. Thanksgiving name place cards. I actually have no idea how it started – it probably began one year with me coloring everyone’s name on an index card, glorifying them with fall related stickers. Either way, I remember it being something that I looked forward to doing every Thanksgiving. Now with my kids, it’s something fun and creative that we can do as a family and also creates a keepsake for years to come.
The basics:
Start with some form of card stock, scrapbook paper, or even buy cheap pre-made place cards from local craft store.
Write the names on the cards.
Decorate with fun stickers, glitter, feathers and other crafty add-ons.
Hint: tiny hands make for cute turkeys!
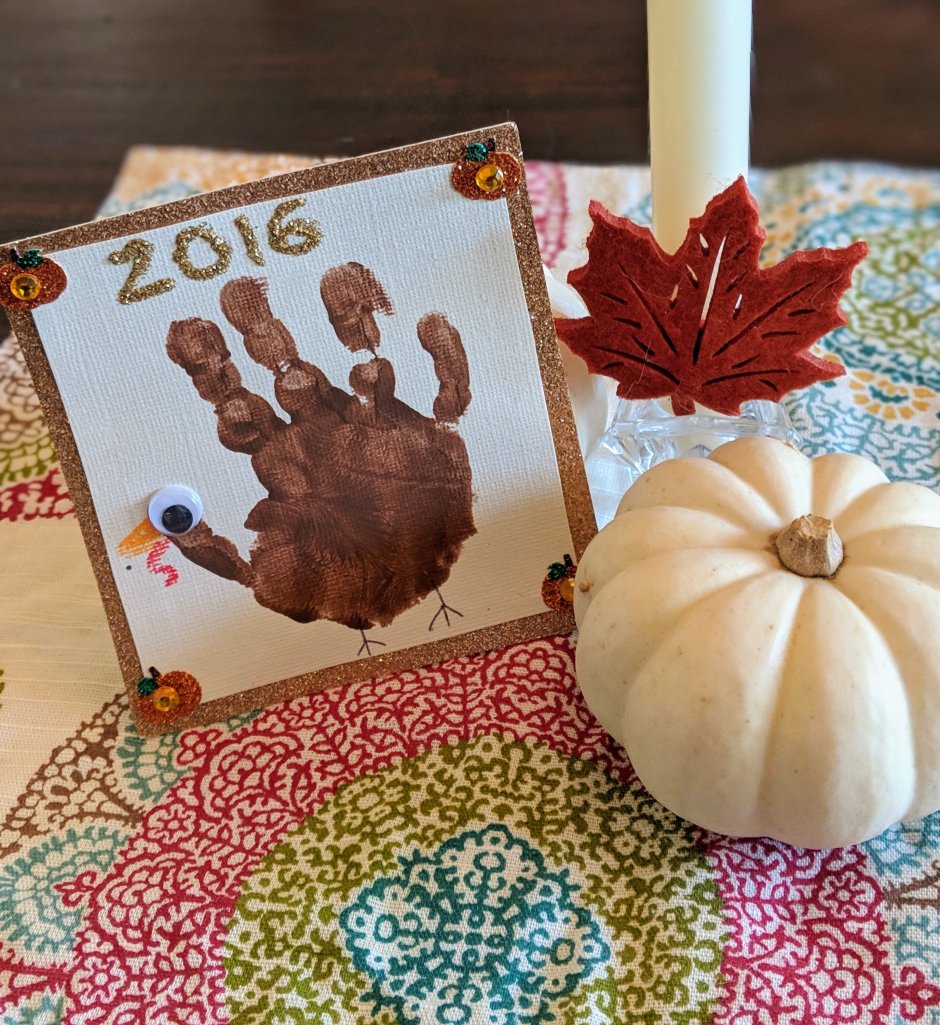
Here is one of my favorites from recent years past made courtesy of Brooks.
We cut glittery scrapbook paper into squares, added painted hand turkey with googly eyes, and finished them off with more glittery pumpkin stickers and glitter glue names.
Last year we took the easy road (aka waited until the last minute and also had a 7 month old) and bought the pre-made fold over cards and added giant 3-D turkey stickers.
This year we are going to “pimp out our pine cones”! Since there is no shortage of pine cones in Asheville, which is where we are travelling this year, I thought this would be an easy and cheap project. Going on the hunt for pine cones will be half the fun and I think any kid would love to paint them and who knows, maybe add a little sprinkle of glitter.
I’d love to hear about your family’s holiday traditions and ideas for place cards. Feel free to leave a comment below. Happy Turkey Day!
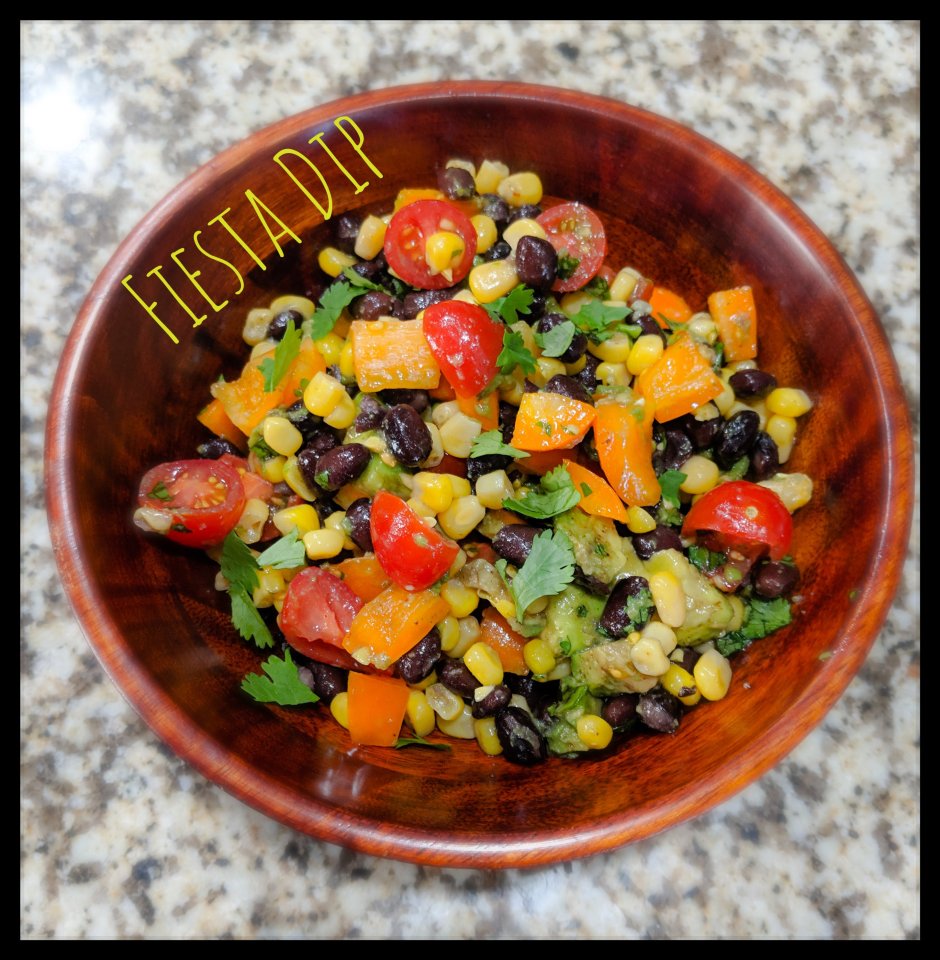
This is by far one of my most requested “recipes”, so I wanted to share it with all of you! I threw this together for a Cinco de Mayo party several years ago and it’s been a staple dish at many parties ever since. It’s super easy – no cooking involved, just assembly — and it’s pretty too! It’s a perfect side dish for any summer BBQ or your weekly Taco Tuesday fiesta! You can serve it as a dip with tortilla chips or simply as a salad on the side. Here’s what you need for this yummy, healthy dip:
One can black beans, strained and rinsed
One small can of corn, strained
One carton of grape or cherry tomatoes, halved or quartered
One bell pepper, diced (I use orange to add to the variety of colors)
1-2 avocados, cubed
A dash or 2 of cumin & chili powder and salt / garlic salt (to taste)
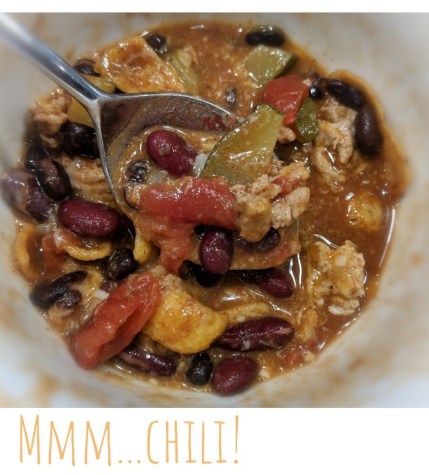
I was hesitant to write a post about this because if you’re anything like me, I’m very particular about my chili, and I assume everyone else is too. Most people have their “go-to” chili recipe, one that they’ve grown up on and can replicate over and over again blindfolded. But for those of you who don’t have a “go-to” chili recipe or you want to deviate and try something different, allow me to share mine. It’s SUPER easy 30 minute recipe, and you can obviously tailor it to how you like it, creating your own “go-to” chili recipe.
Ratio. It’s all about the ratio for me and I love beans! Lots of beans!!! If beans aren’t for you, you may want to quit reading now. But if you’re a bean lover, you’re in good company. Without further ado, here’s my “recipe”:
1 lb ground organic turkey or beef
1 can dark red kidney beans
1 can of black beans, strained and rinsed (you can use any kind of beans you like)
1 14oz can diced tomatoes
1 cup diced zucchini
1 packet of Chili seasoning mix (we prefer mild McCormick)
Shredded cheddar cheese and Fritos, for toppings
Instructions:
Heat 2 Tbsp oil in a large heavy pot over medium/high heat, and brown the meat. If using a high fat content beef, drain excess grease after browning meat.
Add zucchini and cook for a few more minutes, until softened.
Stir in packet of seasoning and let cook 1 min.
Add kidney beans and strained black beans.
Add can of diced tomatoes.
Add 1/2 cup of water and stir all together.
Bring chili to simmer and cook for 20 minutes.
Ladle chili into bowl and top with cheese and Fritos.
As a mom of two, I know how hard it can be to get your kids to eat their food at meal time. Dinner is by far our most challenging meal, as many of you can probably relate. After a long, stressful day at work, the last thing you want to do is have to figure out a dinner that you can throw together in less than 30 minutes that will make everyone happy. Add on the juggle of a 4 year old and 18 month old, and dinner prep is not usually something I look forward to either. It’s on nights like these, when I have nothing planned for dinner that I like to turn to some of my easy, go-to staples. And when you can throw in a little FUN, sometimes it turns the dinner challenge into a dinner winner. Tonight, we incorporated a little ghoulish Halloween fun into our dinner!
On the menu…
GHOST TOASTwith extra GHOSTEYEBALLS – any kind of bread toasted (we had pumpkin toast), spread with cream cheese and 2 blueberries as eyes. Extra “eyeballs” on the side
SCARECROW BRAINS – scrambled eggs with your favorite cheese
Magical WAND – fully cooked sausage links, heated in pan (hint: I told Brooks the magic only lasts for 3 spells, and then it’s gone – otherwise your little goblins will never eat it…didn’t foresee this coming)
WITCHES BREW – milk or drink of choice; kids can stir a little Nesquik into their cauldron if you choose
Evie’s wand had to be cut into pieces…
Brooks’ best “ooooooo” ghost sound
If you’re looking for some other ways to incorporate some fun into your food here’s what you need:
Start with a vessel — whole grain bread, bagels, tortillas, pizza crusts, etc.
Add a spread aka “the glue” — hummus, cream cheese (all flavors), peanut butter, tomato sauce, pesto, etc.
Add whatever fun toppings you want — fruits, veggies, shredded cheese, pepperoni, beans, etc. Hint: letting your kiddos help “decorate” their creations gets them involved, which I find makes them want to try new things. Win win!
Be creative! I keep an abundant amount of cookie cutters on hand to cut out fun shapes. Some of the faves include the teddy bear, heart, car, dinosaur, apple, flower, and airplane.
Feel free to share some of your favorite fun food ideas — I would love to add them to my list!
This mantra is something I’ve always held on to when times get tough. I’d like to dedicate this post, in honor of breast cancer awareness month, to my momma, and tell you a little bit about her, and how she shaped me into the woman I am today.
The date was August 2014. James and I were sitting on the couch watching tv. There weren’t many other activities I wanted to partake in while being 8 months pregnant. My cell phone rang and it was my mom, which was not unusual since we talk at least a couple of times a week. But the one thing I did know, because she is a horrible liar and her voice tells all, was that something was wrong. Very wrong. The news, which hit me like a Mack truck crashing into every bone in my giant pregnant body, was devastating. My mom had cancer. Breast cancer. What?! No one in our family has had breast cancer, so it came as quite a shock. It was nearly impossible to digest. While I held it together on the phone, asking her all the hows, whens, and whats, as soon as the call was over, I broke down, collapsing into the arms of my husband. Fortunately, James had already talked to my parents and knew what was coming. I couldn’t even begin to believe what I had just heard.
Just a few weeks later my mom underwent her first surgery, the first step on her journey to fighting back against cancer. And just a couple of weeks later, her first grandchild was born. Never in my life have I experience such a dynamic shift in emotions, so I cannot even fathom the roller coaster my mom was on. Her trek continued when she underwent another surgery, followed by 6 chemo treatments, and 32 radiation treatments, bringing her treatment course to nearly a full year. There were ups and downs with some mountains and trenches along the way, but my mom never gave up. I remember talking to her often and while she was generally in good spirits the day before chemo, she was a mess the days following, her body battling to keep up with the chemo she had just received.
While I cannot even begin to tell you the depths of her story, or the highs and lows she went through physically, emotionally, and spiritually, I can tell you this: my momma is a ROCKSTAR. Three years later and she remains cancer free! Reflective of her positive spirit in life, she never once complains about anything or anyone (well sometimes about my dad…lol). She has ALWAYS been there and continues to be there for me and my bros – I only wish that I can be half the mom she is. She epitomizes the term hard worker. She has worked her butt off for everything that she has, earning every piece of it. One of my fondest memories growing up as a young woman was going into my mom’s office at work. It oozed dedication, confidence and joy — all of which I think she instilled in my own work ethic. She is selfless. I mean the lady was handed a cancer diagnosis and she was more worried about telling me because she didn’t want it to affect the pregnancy or baby. She never ceases to amaze me.
Twinning.
Often times we coin cancer survivors as “fighters”. Well, for my mom, it wasn’t in August 2014 when she started fighting. She has always been a fighter. She did not let her cancer diagnosis define her. Instead, she redefined cancer. She’s a warrior. For me, for my brothers and my dad, her grandkids, her family, her friends, her church, and anyone else she has a relationship with in her life. She will continue to fight because that’s who she is. She doesn’t give up on anyone. You can only be so lucky to have her as a part of your life. I know I am, and I thank God for her everyday. Despite this journey being one of the most difficult things in my life, I am so grateful for my mom, and for the lessons she has taught me throughout this journey and life. Remember, what doesn’t kill you makes you stronger. I love you Momma/GiGi!
For those of you reading this who are cancer warriors, or have your own warriors in your life, I praise you and envy your strength and tenacity. You are awesome.
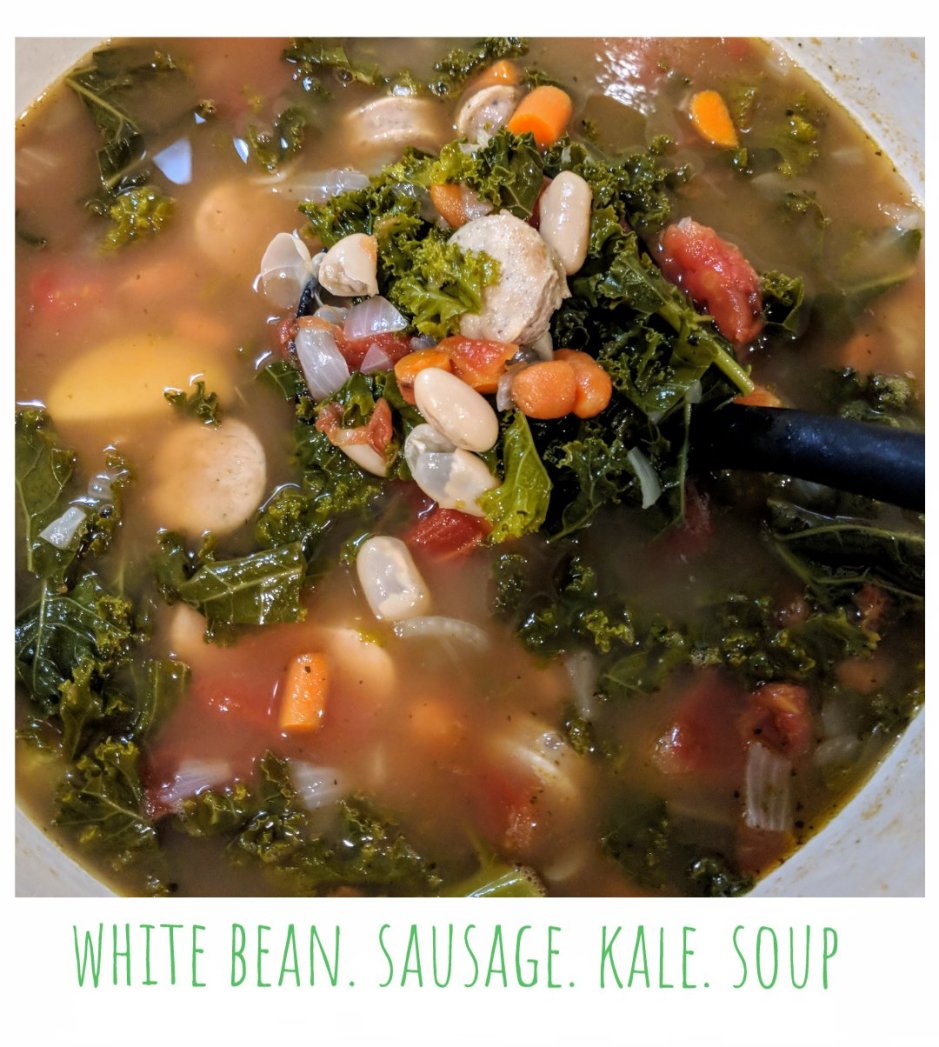
One of my favorite soups of all time…White beans, sausage, and kale. I have a love for anything white beans or sausage, so I knew I couldn’t go wrong marrying the two together in this hearty soup. Living in the trendy “super foods” era, the addition of kale made this recipe ever more popular with friends and family. Quick and easy, this is a stove top recipe that takes less than 30 minutes to make, but as with any soup, is better the longer it simmers, and even more savory the next day. Topped with shaved Parmesan and a piece (or 2) of crusty bread, and this soup will leave you feeling warm and satiated long into the night. Without further ado, here are the ingredients and step by step.
Ingredients list:
(Note: I tend to use what I already have on hand so feel free to do the same.)
1 pack (12-16 oz) of sausages, sliced (I used precooked Boar’s Head chicken sausage, but you can use whatever you like or have. If my kids weren’t eating it, I would use Italian spicy sausage.)
2 cans white beans, one drained and rinsed and one with their juice
Bag of kale, or a bunch of fresh kale, chopped (make your life easy and buy the bag – you will only use some of it, and will have leftovers for your kale smoothies or chip)
Small yellow onion, chopped
Garlic clove, minced
3/4 c. Baby Carrots or 2-3 whole carrots, sliced (I had a bag of baby carrots from the kids’ snacks so I used those)
1 can of diced tomatoes (can also use crushed tomatoes, or actual tomatoes)
8 cups or two 32 oz. cartons of chicken stock
Italian seasoning (my go-to is Mrs. Dash Italian Medley)
Salt and pepper to taste
2 TBSP Olive oil
Optional: small yellow potatoes (I had a few leftover so I quartered them and tossed them in the pot); crusty bread and Parmesan for serving.
Step by Step:
Heat 2 TBSP olive oil in large heavy pot over medium/high heat. Add chopped onions and carrots, and cook until softened, about 6 minutes.
Add the sliced, precooked sausage and garlic and cook another 2 minutes. Note: if you are using uncooked sausage, you will want to reverse steps 1 and 3 and cook the sausage first before adding in the carrots and onions.
Season with about 1 tsp of salt, 1/4 tsp of pepper, and 1/2 – 1 tsp of Italian seasoning. I don’t measure but rather give it a few hefty shakes.
Add the can of diced tomatoes, and 8 cups of chicken stock.
Bring to a boil and then reduce heat to medium/low and simmer for at least 10 minutes.
Add white beans, and 2 heaping handfuls of kale (about 2 cups). It will look like a lot in the pot but it will cook down.
Raise heat to medium and cook for another 5-10 minutes, until kale is tender. Taste soup and add more salt/pepper if you’d like. Continue to simmer on low for 30 minutes if you want to and have time, but not necessary!
Ladle soup into bowl and garnish with Parmesan cheese, served with a side of crusty bread. Enjoy!
Allow me to introduce you to our newly turned 4 year old B-Man, formerly Baby Brooks (but will always be BB if you ask his daddy). For the past 3 years, we have done the obligatory cupcakes or cookies for his class birthday celebration. Although I may groan about it, not recognizing what I get myself into sometimes, I secretly love doing it. But this year I vowed to do something different. Tired of the fake-colored, sugary store-bought treats, I feverishly searched Pinterest for “alternatives to school cupcakes”. While I did not find exactly what I was looking for, partly because I did not know what I was looking for, I did come away from my search with some ideas.
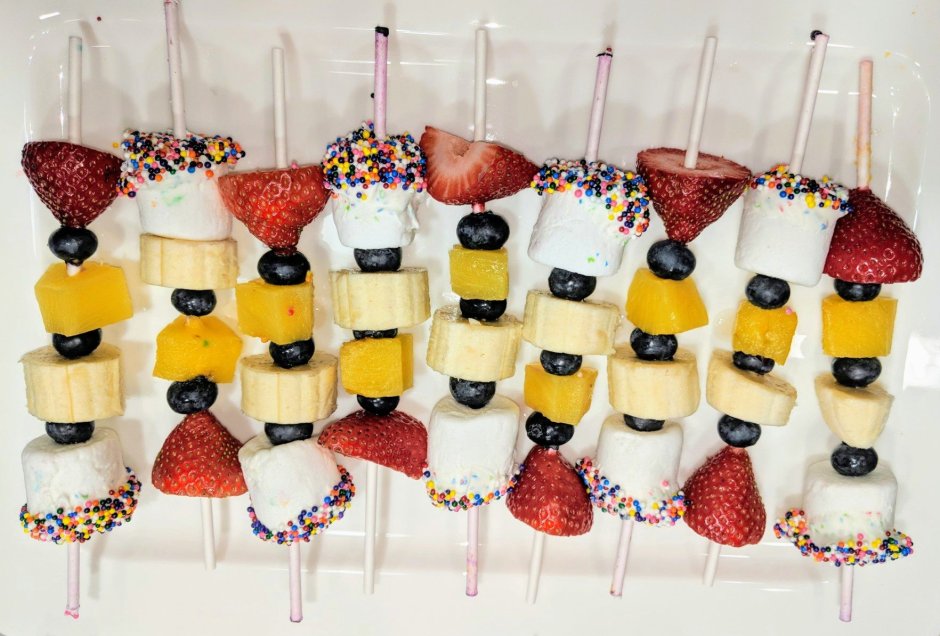
I wanted to do something fun for the kids and something B could help me make for his friends. That’s how we came up with the kabob idea.
I wanted something decently healthy, so fruit was the focus.
It also had to have a “birthday flare” to it, so of course, sprinkles came to mind. And what could I douse in sprinkles, that would also fit on a kabob? One of Brooks’ favorite treats, MARSHMALLOWS.
Thus, 1+2+3 = Birthday Kabobs!
These treats were super easy to make, and a really fun way to get your kiddos involved; only if you don’t mind them eating the project along the way, as evidenced above. Also, for those fans of the show Umizoomi and Milli’s pattern power (in your best singing voice), this activity provides a great opportunity for your kids to learn about patterns. And yes, I realize I missed a blueberry on one – oops!
Here’s what you need to make the kabobs:
Assortment of whatever fruit you like that can be skewered. We used strawberries, bananas, blueberries, and canned pineapple chunks.
A bag of big marshmallows
Sprinkles
Chocolate candy melts – you can find these at your local craft store in all colors. I used the white chocolate party melts.
8″ treat sticks – also found at local craft store. They look like the white cake pop sticks.
And here is how:
Wash hands 🙂
Have your marshmallows ready to dip, and pour the sprinkles out on a plate or any shallow pan with sides.
Melt the chocolate candy according to the directions on the bag. You have to work kind of fast before the chocolate hardens again, but even if it does, just nuke it again to melt it.
Dip the ends of the marshmallows into the chocolate, then the sprinkles, and set on wax paper. Repeat for as many as you need. We made 20 kabobs, but probably had 25 marshmallows to begin with. They seemed to disappear along the way.
Wash and prep the fruit. Trim the tops off the strawberries, and slice the larger ones in half. Cut the bananas into one inch rounds.
Skewer the fruit and end the kabob with one of the birthday marshmallows. Brooks helped me with making the marshmallows but I skewered the actual fruit, while he helped me with the pattern.
Enjoy! I will admit I was a little nervous about Brooks’ friends just eating the marshmallows and leaving the fruit on the stick, but I was pleasantly surprised that every kid (all 19 of them) ate every.single.bite. of the kabobs. And the teachers enjoyed them too. They were a hit and Brooks was so proud to be able to say he helped make them!
Note: you can make these ahead of time, and refrigerate them for the next day. Just be sure to tightly wrap them so the marshmallows don’t dry out.
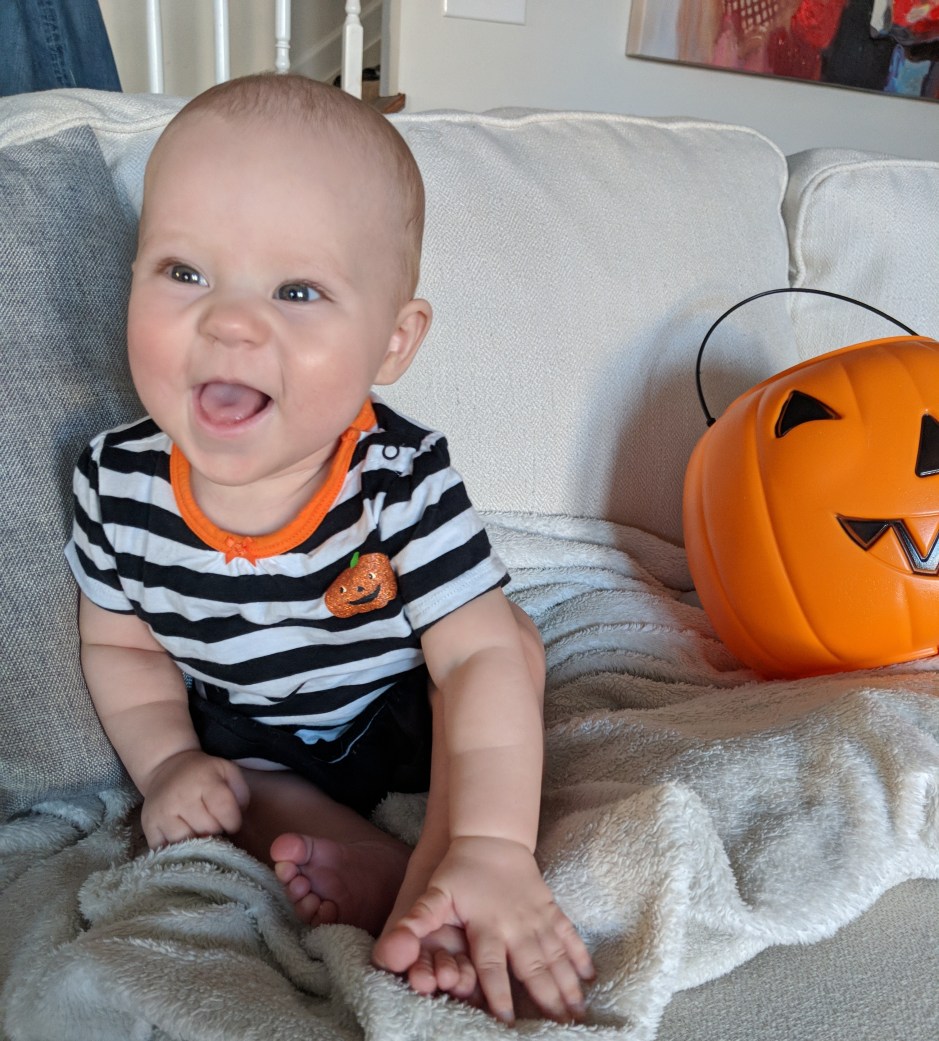
Of course one of the first foodie posts has to be an ode to FALL. Above is my little pumpkin from last year.
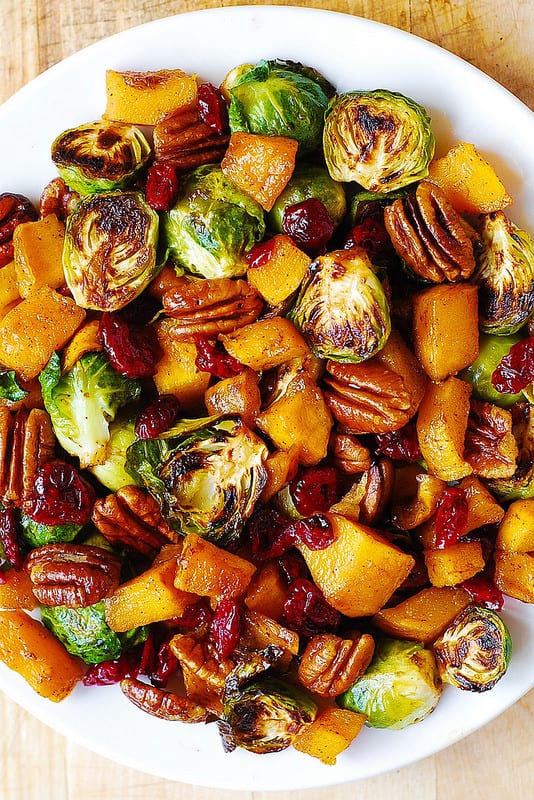
Fall is my favorite time of the year. It used to be summer, but as I get older, I’ve learned to love the cooler temperatures, cozy leggings and scarves, and all of the yummy goodness that comes with this time of year. Although I will admit, I’m not a PSL fan. I know, I will probably lose some of you over that statement, but I just can’t get into the hype. Nevertheless, I wanted to share with you one of my favorite fall recipes. This side dish is a perfect accompaniment for your Thanksgiving feast, but can also be put together (yes, it’s more of an assembly meal than actual cooking, so any of you can do it) for a potluck or served alongside a grocery store rotisserie chicken for a scrumptious dinner.
This recipe is adopted from Julia’s Album, and linked above. I found it for Thanksgiving a few years ago and it has since become a staple every holiday. It’s a simple recipe and requires very little cooking knowledge or experience, but makes people think you spent time more than what it actually takes. The colors are beautiful and represent the hues of fall – red, green, orange, yellow, brown – I love it!
Photo cred: Julia’s Album
Personally, I am not a huge recipe follower, which is why I love to cook, and not bake. A little of this and that and you can’t go wrong. However, I follow this recipe fairly closely. The only minor adjustment I make (and maybe this will win back some of those PSL lovers) is the addition of BACON. Everything is better with bacon. For the brussels sprouts, sub out 1 TBSP of EVOO for 1 TBSP of the bacon drippings reserved from the cooked bacon. Then add the crumbled bacon at the end with the dried cranberries and walnuts. Yep, I prefer chopped walnuts over pecans, but you do you. Also, I do not add the extra syrup at the end as I find it makes it too sweet. Last thing, make your life easy and buy the pre-cubed butternut squash in the produce section at the grocery store. You can use the time you would have spent sawing a butternut squash drinking wine. You’re welcome! Enjoy!
This is my husband of 5 years, James. We’ve been together since 2005, so it doesn’t seem right that we’ve only been married for 5 of those years. Most of our closest peeps know that we got married in September 2013, only to find out I was pregnant in December 2013. That was a surprise! We didn’t get to enjoy our Mr. & Mrs. titles for very long before we became Mom & Dad. Fast forward to September 2014 (yes, we love September) when Baby Brooks was born. Two and half years later in April 2017, our Evie Marie made her worldly debut. All of that to say James and I have been busy, and have not had a real vacation, just the two of us, since our honeymoon. So when it came time to plan our 5 year anniversary trip, we went all out! Here’s a look at our trip to Gateway Canyons Resort, in Gateway Colorado.
The Palisade
See that giant red rock cliff behind us? That is better known as the Palisade. Located in Unawheep Canyon, Gateway is a small town just over an hour from the Grand Junction airport. It makes sense this resort was created by the same guy who started the Discovery Channel. The resort was remote, peaceful, and absolutely gorgeous, painted with the most serene views of these giant red rock canyons, including the Palisade. It was like nothing I had ever seen before. Being the boy scout he never was (but totally could have been!) James navigated us on several hiking trails, winding in and around the canyons. Several times along the way we came across these rock stacks, evident there was someone there before us, and that was how they left their mark. On our final hike, we made our own rock stack on one of the highest points of our hike. You can see James’ art below. You could not beat the 360 views of this place. It was breathtaking.
Just Keep Breathing…
Yall, when I say this is the most TERRIFYING thing I have ever done in my life, I mean it. This resort offers a lot of adventurous activities, including horseback riding, rifle shooting, archery, mountain biking, hiking, and UTV tours. When I called to reserve our UTV tour, the lady described it as a “scenic and educational tour” through the canyons. Not once did she think to tell us we would be driving (well James would) a UTV up the sides of sheer cliffs to an elevation of 7000ft – the resort sits at 4500ft so we trekked about 2500ft in about an hour. The roads were narrow and windy and traction was difficult on the dry desert sand and rocks. Here comes the best part – James and I are both terrified of heights. Yep. Had that lady told us what we were actually going to be doing, I’m not sure I could have said yes.
Words cannot even begin to describe how sweaty I was, not from the 90 degree heat, but from sheer terror. I’m pretty sure I was on the verge of an anxiety attack. Thank GOD for my courageous hubs who drove that bad boy up the cliffs. He failed to say very many words on the way up, and I knew why once we reached the peak. He was beyond scared. Anyways, I think you get the point. It was scary. But really amazing once we got to the top and could see for 100 miles. I’m thrilled to have shared something so challenging (physically, mentally and emotionally) with my partner in crime and come out of it 1. alive, and 2. braver than when we started. Just when you think you cannot do something, because trust me, we both wanted SO BADLY to turn around once we saw where we were going, you surprise yourself. We had to dig deep, and just keep breathing, but we did it, and it was one for the record books.
That peak behind the pool is where we drove to.
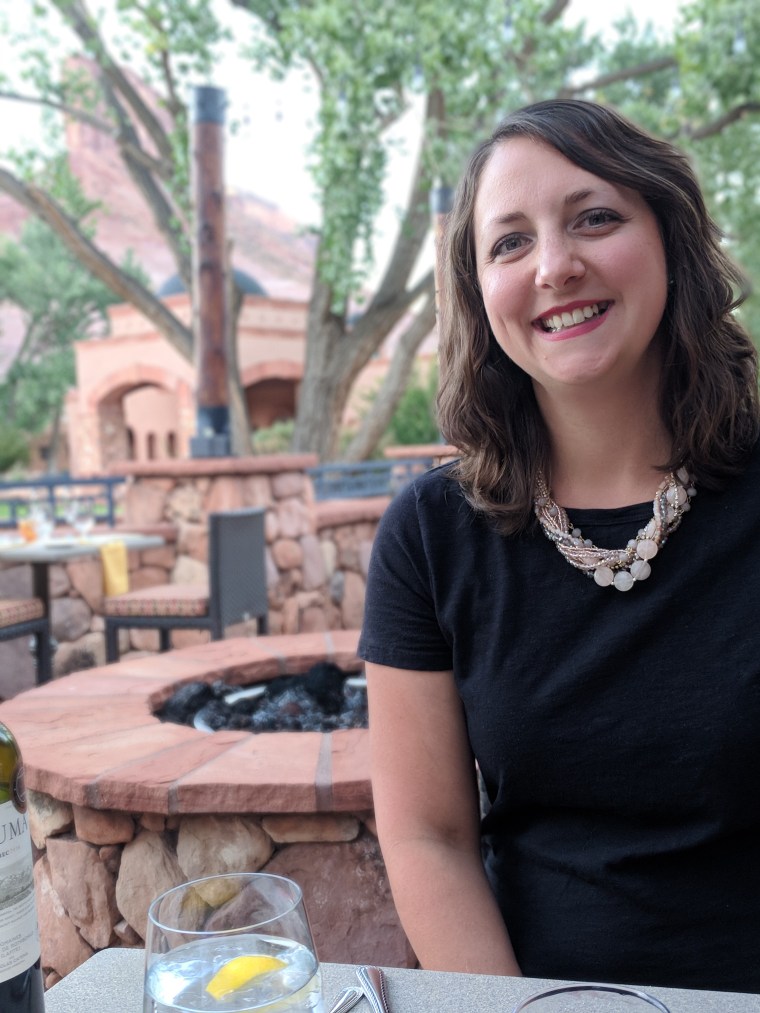
Eats & Libations
It’s safe to say we both needed a stiff cocktail after that UTV adventure…It’s a good thing we chose an “adventurous” vacation destination. I’d like to think between the hiking, yoga, and little biking we did (on top of the sweat that I poured out during the UTV tour), we balanced out at least a third of our meals. Maybe? Hopefully. The food at the resort was phenomenal. I ate my weight in chips and salsa and guacamole. We also had yummy wraps and sandwiches, and the best chicken wings ever dusted in chili powder (we might try and recreate them!). For our fancy night out on our actual anniversary, I had halibut over artichoke puree and James tried wild boar ragout. Both delish! We ended that night with s’mores for dessert over a poolside fire pit, while listening to a “real cowboy” tell stories about his great grandparents and growing up on a ranch in the West. It was quite interesting.
Prickly pear margarita.
Final Thoughts
If you are ever near Grand Junction, or are looking for a peaceful vacation mixed with the outdoors, you have to visit Gateway Canyons. I cannot say enough wonderful things about this place. It was absolutely perfect, and I am so beyond happy to have spent the quality time with my main squeeze. Hope yall enjoy!
Let the good times roll! Let me start my first post by saying welcome and thank you for spending your time reading my blog. My blog. That still sounds weird. Anyways, my husband and I recently visited Gateway, Colorado (post to follow) for our 5 year wedding anniversary and it was on that trip where I cracked open Girl, Wash Your Face by Rachel Hollis. Let me first say that I’m not a huge reader so it’s really tough to keep my interest in books usually. Funny story – I also hate writing, but whatever. However, there was something about this book – maybe the chapter titled “I’ll Start Tomorrow” about starting with a small goal – that sparked the crazy idea “Hey, why don’t you start a blog?”. I started thinking, “How hard can it be?! There are so many people you know that have a successful blog – it will be WAY easier than a food truck!” (The food truck idea is something I always joke about quitting my job and starting, but that goal is more of a glorified dream.) Having said that, I’m going to be 100% honest, which is also how Rachel’s book reads and supplies inspiration to follow in her footsteps – I have NO idea what I am doing!
If you’re still reading this, bless you. So here are a few ideas of how I envision to use this platform:
I want to share snapshots of my life, and things that are important to me, and what I consider myself to be decent at.
I am going to share my love of cooking, both kid-friendly and not (because it’s not always about them!), party planning, home decor, juggling mom/wife life, and whatever else may run through my crazy mind.
Although having followers would be a huge honor, I am doing this for myself. I know that sounds selfish, but it’s a test to myself to see this through. Like I said, I’ve never done anything like this, nor do I really have any experience with how to do this, but at least I can say I tried. I love being creative and I am excited to have this avenue to share my life with yall.
Last thing – the name: Charlotte Cajun Queen. Check out my About CCQ page to read more about me!


 For those of you reading this who are cancer warriors, or have your own warriors in your life, I praise you and envy your strength and tenacity. You are awesome.


 Allow me to introduce you to our newly turned 4 year old B-Man, formerly Baby Brooks (but will always be BB if you ask his daddy). For the past 3 years, we have done the obligatory cupcakes or cookies for his class birthday celebration. Although I may groan about it, not recognizing what I get myself into sometimes, I secretly love doing it. But this year I vowed to do something different. Tired of the fake-colored, sugary store-bought treats, I feverishly searched Pinterest for “alternatives to school cupcakes”. While I did not find exactly what I was looking for, partly because I did not know what I was looking for, I did come away from my search with some ideas.